
- Key Takeaways
- What tools do you need for a DIY calibration?
- Which type of thermostat do you have, and why does it matter?
- How do you know if your thermostat reads the wrong temperature?
- Step-by-step calibration by thermostat type
- How long does calibration take, and how do you confirm it worked?
- Safety steps and wiring cautions you should follow
- When should you call an HVAC professional?
- Thermostat placement and simple maintenance that prevent future drift
- Why thermostat accuracy matters more than most homeowners realize
- A pro’s honest take on thermostat calibration
- LC Heating and Air Conditioning offers flat-rate thermostat diagnostics in Los Angeles
- Sources
- FAQ
- Recommended
Thermostat Calibration: Quick DIY Check and Fix Guide
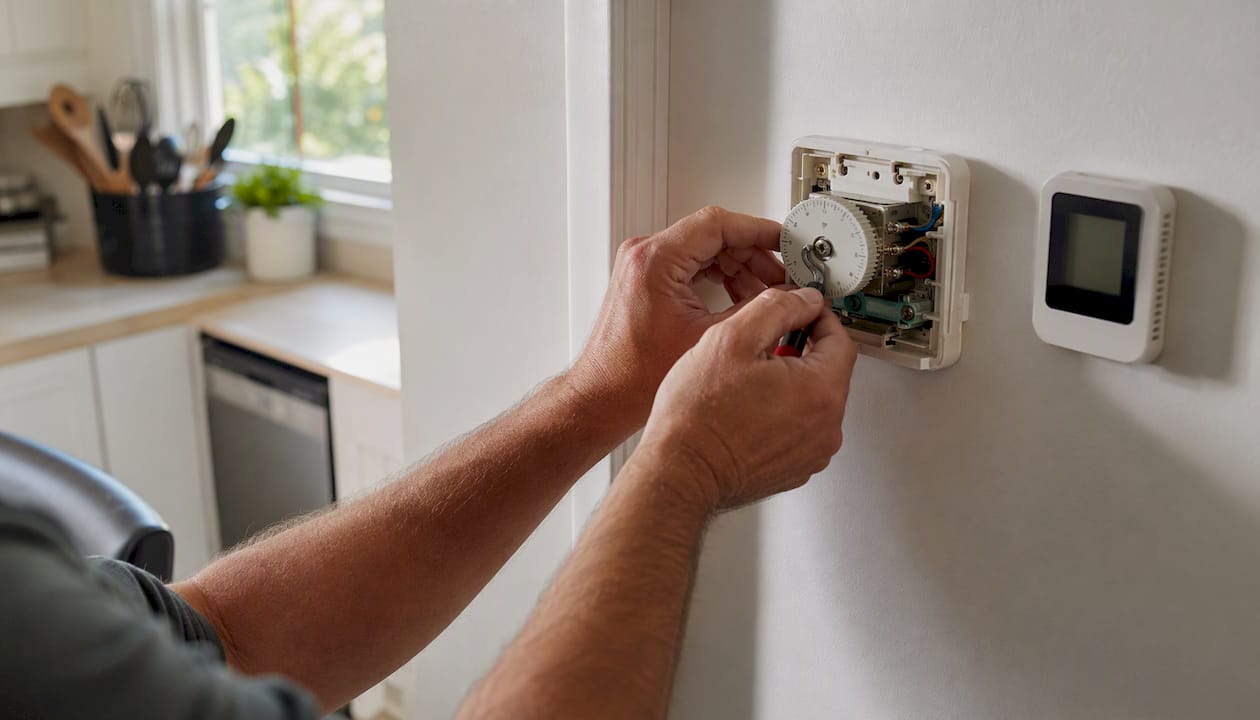
Most homeowners can verify and fix thermostat calibration in 20–30 minutes with a reference thermometer. Adjust a digital offset or a mechanical screw, re-test, and you’re done. Call a licensed HVAC technician for persistent errors above 3°F, any wiring faults, or if your unit contains mercury.
The checklist approach is straightforward: verify your thermometer, compare readings with the HVAC off, apply the offset or screw adjustment, then re-test after 15–20 minutes. That’s the whole process for most homes.
Call a pro when: the gap stays above 3°F after your DIY fix, you spot frayed or unfamiliar wiring, the unit contains mercury, or calibration keeps resetting on its own.
Key Takeaways
Thermostat calibration takes under 30 minutes with a reference thermometer; use a digital offset when available, adjust mechanical units slowly, and call a pro for any variance above 3°F or wiring concerns.
| Point | Details |
|---|---|
| Test before adjusting | Tape a verified air-probe thermometer next to the thermostat and wait 15–20 minutes with the HVAC off. |
| Use the offset menu first | Digital and smart thermostats have a temperature offset setting; use it before touching any hardware. |
| Mechanical units need care | Adjust the calibration screw in quarter-turns; if the bimetallic strip is corroded, replace the unit. |
| Know the 3°F threshold | A variance above 3°F after DIY adjustment usually means replacement or a professional diagnostic. |
| LC Heating and Air Conditioning | Offers flat-rate thermostat diagnostics and same-day service across Greater Los Angeles. |
What tools do you need for a DIY calibration?
Getting the right tools before you start saves a second trip to the hardware store.
Essential items:
- A high-quality digital air-probe thermometer (±0.5°F accuracy; NIST-traceable models are ideal)
- Tape or a rubber band to hold the thermometer next to the thermostat
- A small flathead screwdriver
- Fresh batteries (replace before testing, not after)
- A small level
- Safety gloves for handling covers
Optional but helpful:
- A voltmeter for wiring checks
- Compressed air or a soft brush to clean the sensor area
Pro Tip: Before you trust your reference thermometer, run a quick ice-bath check: fill a glass with ice and just enough water to cover the ice, insert the probe, and wait two minutes. A properly calibrated thermometer reads 32°F. If yours reads 34°F, you know to subtract 2°F from every reading you take.
Which type of thermostat do you have, and why does it matter?
Knowing your thermostat type determines which calibration method applies — and which safety rules you must follow.
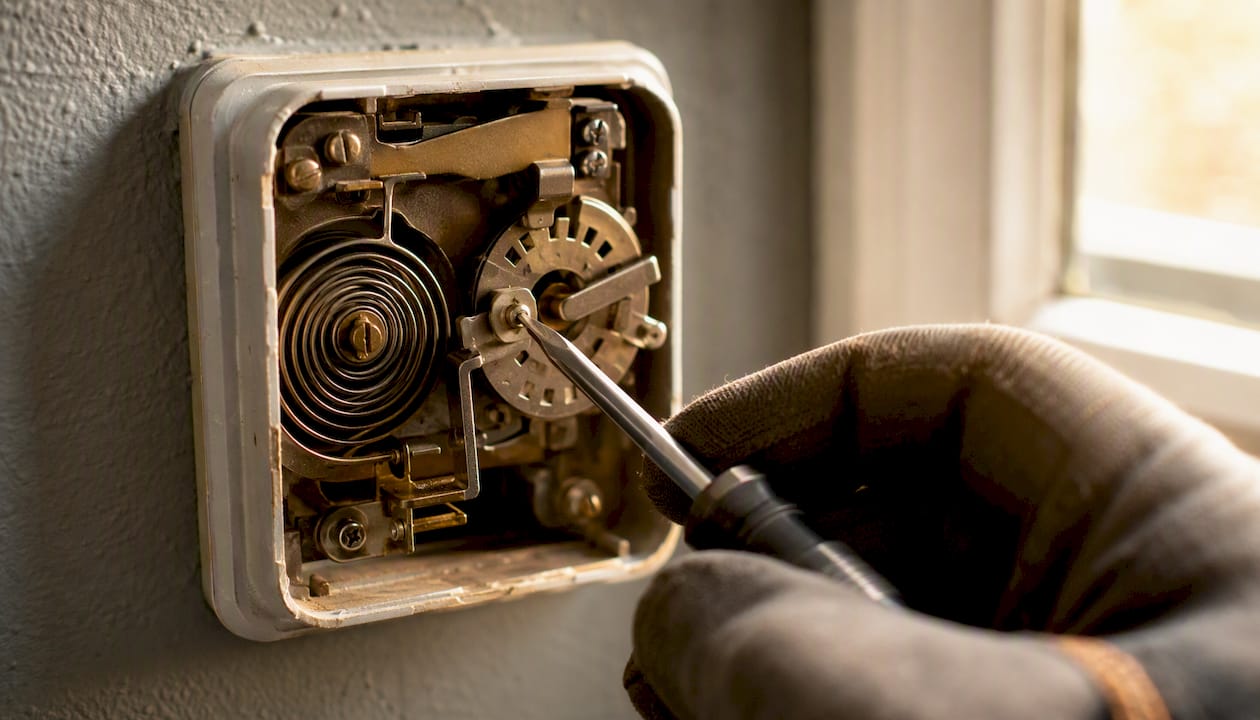
Mechanical/bimetallic thermostats are older round or rectangular units with a dial or slider. They use a coiled bimetallic strip that expands and contracts with temperature. Calibration means adjusting a small physical screw or the heat anticipator wheel inside the cover.
Digital and programmable thermostats display a numeric setpoint and usually have a menu system. Most models include a “temperature offset” or “display offset” setting in the installer or advanced menu. That’s your primary calibration tool.
Smart/Wi-Fi/learning thermostats (Nest, Ecobee, Honeywell Home T-series, and similar) connect to an app and often receive firmware updates that correct sensor drift automatically. Many also support remote room sensors, which is a more accurate fix than a manual offset when airflow or placement is the real problem.
Mercury thermostats are a special case. The small glass vial of mercury inside is a hazardous material. Do not open, tilt, or attempt to adjust these units yourself. Schedule a thermostat replacement with a licensed technician who can handle proper disposal.
How do you know if your thermostat reads the wrong temperature?
A thermostat that’s off by even 2°F can make your home feel uncomfortable and push your energy bills higher. Watch for these signs:
- Rooms consistently feel warmer or cooler than the setpoint
- Heating or cooling cycles run unusually long
- Short-cycling (the system turns on and off in rapid succession)
- The setpoint temperature is never quite reached
- Readings seem to shift throughout the day with no change in weather
The quick self-test: Tape a verified digital thermometer directly next to your thermostat, turn the HVAC system off, close windows and doors, and wait 15–20 minutes. Compare the two readings.
A small variance within a few degrees Fahrenheit is within normal tolerance for residential thermostats. Larger variances suggest calibration is worth doing, while very large discrepancies often indicate sensor problems, placement issues, or need for replacement, rather than a simple offset adjustment.
A 1°C (≈1.8°F) sensing error can force longer HVAC run cycles and reduce overall system efficiency, according to engineers who design temperature measurement systems.
Step-by-step calibration by thermostat type
A reference thermometer and the thermostat’s offset menu cover the vast majority of DIY calibrations. Here’s the full procedure.
Universal pre-check (all types):
- Verify your reference thermometer with the ice-bath test described above.
- Turn the HVAC system off at the thermostat.
- Confirm no drafts, direct sunlight, or heat sources are near the thermostat.
- Wait 15–20 minutes for the air to stabilize before reading.
Digital or programmable thermostat:
- Note the difference between your reference thermometer and the thermostat display (e.g., thermostat reads 74°F, reference reads 71°F — offset is +3°F).
- Enter the installer or advanced settings menu (check your model’s manual; many require holding two buttons simultaneously for 3–5 seconds).
- Find “temperature offset,” “display offset,” or “calibration” — the label varies by brand.
- Enter the correction with the correct sign (in the example above, enter −3°F).
- Save and exit the menu.
- Re-test after 20 minutes with the HVAC running normally.
Mechanical/bimetallic thermostat:
- Shut off power at the breaker before removing the cover.
- Use a small level to confirm the unit is perfectly level — a tilted bimetallic thermostat reads incorrectly by design.
- Clean the sensor coil gently with compressed air or a soft brush.
- Locate the calibration screw (usually near the coil) or the heat anticipator wheel.
- Adjust in small quarter-turns, replace the cover, restore power, and re-test after 20 minutes.
- Repeat until the reading matches your reference thermometer within 1–1.5°F.
If the bimetallic strip looks warped or corroded, physical adjustment won’t restore accuracy — replacement is the right call.
Smart thermostat:
- Open the companion app and check for pending firmware updates. Install them first; many updates include sensor recalibration.
- Look for a temperature offset or “home/away” correction setting in the app or device menu.
- If your model supports remote room sensors (Ecobee SmartSensor, for example), adding one in the primary living area often resolves perceived inaccuracies better than any manual offset.
- Follow your model’s documentation for any manual offset — the menu path differs between Nest, Ecobee, and Honeywell Home devices.
Pro Tip: If your digital thermostat has no offset option anywhere in its menus, do not attempt to modify the sensor electronics. Replacement is the correct fix, and it’s usually inexpensive.
How long does calibration take, and how do you confirm it worked?
The full test-adjust-retest cycle takes under 30 minutes for most homes. After applying your offset or mechanical adjustment, leave the reference thermometer in place and run a normal HVAC cycle.
Timing guidelines:
- Initial stabilization before testing: 15–20 minutes with HVAC off
- Post-adjustment re-test window: 20–60 minutes with the system running
Accuracy thresholds to aim for:
- ±1°F to 1.5°F: ideal for residential comfort
- 1.5°F to 3°F: calibration is warranted
- Above 3°F: replacement or professional diagnosis is usually the better path
Test at two different times of day — morning and evening — to rule out placement artifacts from shifting sunlight or cooking heat. An air-probe digital thermometer gives you a true air temperature reading; an infrared surface thermometer measures wall temperature, which is not the same thing and will give you a false reading every time.
Safety steps and wiring cautions you should follow
Most calibration work is low-risk, but wiring checks carry real electrical hazards.
Safety checklist before you open the thermostat cover:
- Shut off the HVAC system at the thermostat before removing the cover
- Turn off the breaker if you plan to touch any wiring
- Use insulated screwdrivers
- Replace batteries before running tests — low battery voltage mimics sensor drift and causes intermittent errors
- Wear eye protection if you’re working near older wiring
Wiring cautions: The 24V control wiring in most thermostats is low-voltage and relatively safe, but a missing C-wire or a loose R terminal can cause resets and apparent calibration failures. Review common thermostat wiring mistakes before probing any terminals.
Pro Tip: If you see frayed insulation, corrosion on terminals, or wiring colors that don’t match any standard diagram, stop immediately. That’s a job for a licensed HVAC technician, not a screwdriver and a YouTube video.
When should you call an HVAC professional?
Some situations are outside the scope of a safe DIY fix. Call a licensed technician when:
- The variance stays above 3°F after two rounds of DIY adjustment
- The unit contains mercury
- You find loose, corroded, or unfamiliar wiring
- Calibration resets repeatedly within days
- You need the thermostat physically relocated
A technician will verify sensor and control board voltage, run diagnostic measurements on runtime and hysteresis, test the 24V transformer output, and either repair wiring or recommend a replacement. For heat pump systems, a pro can also confirm that the thermostat’s O/B reversing valve wire is configured correctly — a common source of apparent temperature errors in heat pump homes.
Cost expectations: A DIY calibration costs roughly $20–$30 for a quality reference thermometer. A professional diagnostic or calibration service typically runs $75–$150 depending on your market. Wiring repairs or thermostat relocation add labor and materials on top of that. If you’re deciding between calibration and a new thermostat, a flat-rate diagnostic visit gives you a clear answer without the guesswork.
Thermostat placement and simple maintenance that prevent future drift
The best calibration fix is one you don’t need to repeat. Placement errors and neglected maintenance cause most recurring accuracy problems.
Placement rules:
- Mount on an interior wall, roughly 5 feet above the floor
- Position in a central location relative to the living areas you use most
- Keep at least 5 feet from supply or return vents
- Avoid direct sunlight, lamps, televisions, and kitchen heat
- Never place adjacent to exterior doors or in hallways with drafts
Maintenance habits that reduce drift:
- Clean the interior sensor area with compressed air twice a year
- Replace batteries every 6–12 months, even if the display still looks fine
- Keep HVAC filters and return grilles clean — restricted airflow creates temperature stratification that makes any thermostat read inaccurately
- After major HVAC work, duct sealing, or equipment replacement, re-check calibration. Airflow changes affect sensed temperature in ways a simple offset won’t catch.
If you’ve recently had ductwork modified or a new system installed, a calibration recheck is high-value maintenance, not optional housekeeping.
Why thermostat accuracy matters more than most homeowners realize
Heating and cooling account for the largest share of home energy use in most U.S. households. A thermostat that reads even slightly wrong doesn’t just affect comfort — it affects how long your equipment runs and how much you pay.
Department of Energy–related estimates suggest that thermostat miscalibration and scheduling issues can increase heating and cooling costs by roughly 10–20% in many homes. That’s a meaningful number on a Los Angeles utility bill, where cooling loads run high for much of the year.
| Impact Area | What a Small Error Does |
|---|---|
| Run cycles | A 1°C (≈1.8°F) error forces longer cycles, per sensor engineering guidance |
| Energy cost | Miscalibration can add roughly 10–20% to heating/cooling costs |
| Equipment wear | Extended cycles increase compressor and blower motor hours |
| Comfort | A persistent 2–3°F offset means the setpoint is never actually reached |
The thermostat is the control center of your entire HVAC system. A small but persistent sensor error cascades into longer runtime, greater wear on the compressor and blower, and a home that never quite feels right. Checking calibration once a year — especially after seasonal transitions — is one of the highest-return maintenance tasks a homeowner can do.
A pro’s honest take on thermostat calibration
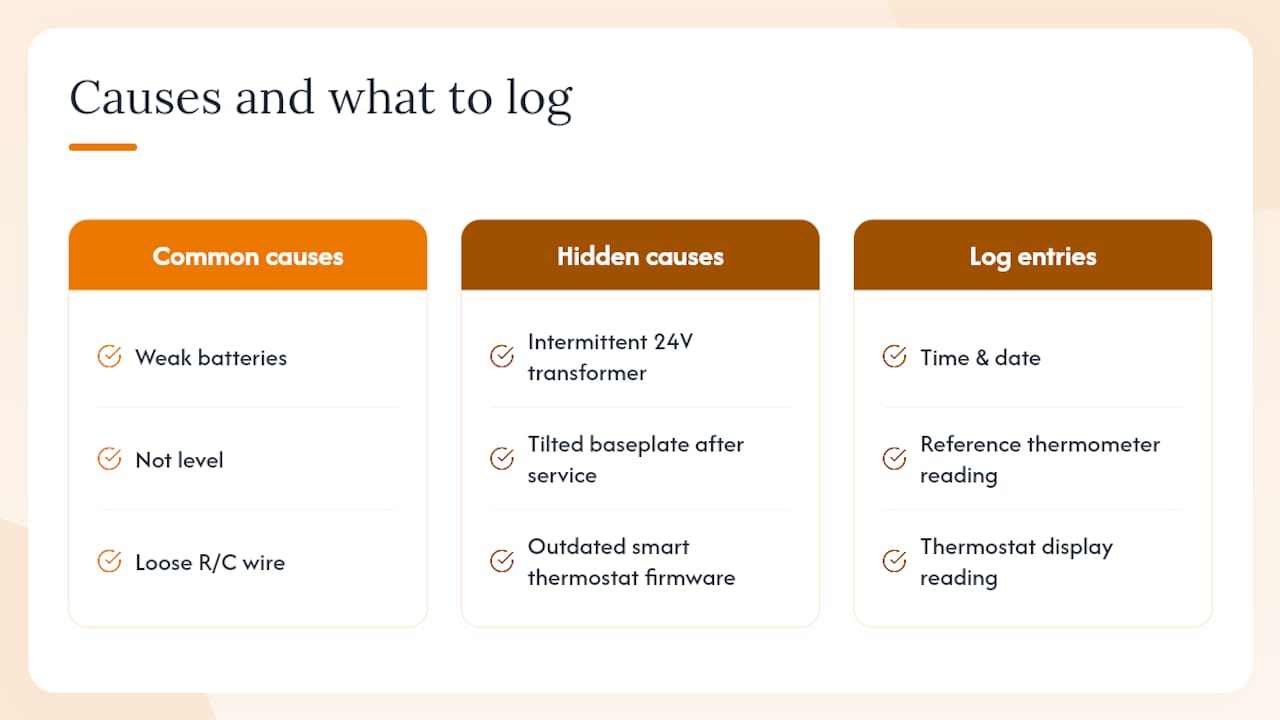
The first things a technician checks when a thermostat “seems off” are almost never the sensor itself. It’s usually the batteries, the level, or a loose wire at the R or C terminal. Those three items account for the majority of apparent calibration problems in the field.
The non-obvious causes that homeowners miss: an intermittent 24V transformer that drops voltage under load, a baseplate that was reinstalled slightly tilted after a filter change, or a smart thermostat that hasn’t received a firmware update in two years. None of those show up as a wiring fault on a quick visual check.
If you’ve adjusted the offset three times and the reading keeps drifting back, stop adjusting and start documenting. Write down the time, the reference thermometer reading, and the thermostat display reading each time you check. That log is exactly what a technician needs to diagnose an intermittent sensor or transformer issue quickly, rather than spending an hour recreating the problem from scratch.
LC Heating and Air Conditioning offers flat-rate thermostat diagnostics in Los Angeles
When a DIY offset isn’t holding or the wiring picture looks complicated, LC Heating and Air Conditioning gives you a clear answer without the surprise bill. The diagnostic visit covers sensor verification, voltage and wiring checks, calibration or replacement recommendation, and heat-pump-aware tuning for homes with mini-split or multi-zone systems.

Flat-rate pricing means you know the cost before any work begins. Same-day and scheduled appointments are available across Greater Los Angeles, and every technician arrives with the tools to handle calibration, wiring repair, or a full thermostat replacement in a single visit. With over 20 years of local experience, LC Heating and Air Conditioning has seen every thermostat problem Los Angeles homes can produce.
Book a thermostat diagnostic or call for advice on whether your unit needs calibration, repair, or replacement.
Sources
- TI technical note (sensor/measurement guidance)
- Thermostat Calibration | Test Accuracy & Save on Energy Bills
- Thermostat Calibration and Maintenance Checklist: Essential Tips for Thermostat Accuracy
- How to Calibrate Thermostat: Simple Steps to Save Energy
- Thermostat Calibration: When & How to Check It | 75°AC
- How to Test Thermostat Accuracy (and When to Replace It) - Keep Cool Heating & Cooling LLC
- How To Calibrate Your Home Thermostat Correctly
FAQ
How do you fix an inaccurate thermostat?
Enter the temperature offset in the thermostat’s installer or advanced menu and set it to the measured difference between your reference thermometer and the display. For mechanical units, adjust the calibration screw in small quarter-turns and re-test after each adjustment.
Does my thermostat need to be calibrated?
If your home consistently feels warmer or cooler than the setpoint, or if a verified reference thermometer shows a gap of 1.5°F or more, calibration is worth doing. Gaps above 3°F usually point to a sensor fault or placement problem rather than a simple offset.
How long does it take for a thermostat to calibrate?
The full process — test, adjust, and re-test — takes under 30 minutes for most homes. Allow 15–20 minutes for readings to stabilize before and after each adjustment.
How do I tell if my thermostat is accurate?
Tape a high-quality digital air-probe thermometer next to the thermostat, turn the HVAC off, wait 15–20 minutes, and compare the two readings. A difference of more than 1.5°F indicates the thermostat needs attention.
Recommended
Leo, Propietario y Técnico Principal en LC Heating & Air
Leo dirige LC Heating & Air como propietario-operador y tiene la licencia C-20 HVAC #1073586 de California. Sus guías se enfocan en diagnósticos prácticos, decisiones de reparación seguras y consejos claros para propietarios de Los Ángeles.


